Showing posts with label mittens. Show all posts

Saturday, May 10, 2014

Fairisle Gloves, Revisited

slisen.blogspot.com
(Click on photos to enlarge)

I loved the gloves I made with this pattern earlier (from Feb 2014) and got a wild hair in my brain to try to use up some Tamm Sport 2/7 that I have in my stash to give a bit heavier fabric.  I was pleasantly surprised that I could use the same pattern without too many alterations.  I did need to decrease the number of rows by 4 in the pinkie finger and I did use different tensions than Ingrid's pattern.  I used T5 in the ribbing, T8 in the fairisle section and T7 for the thumb and fingers.  I have some other lovely fairisle patterns that would be nice but think I'm about gloved out right now and need to move on.  But I won't hesitate to make more as my time permits.  We're finally moving into nicer spring weather now and will have other fun things to do.

Here's Ingrid's pattern if you want to give a nice pair of gloves a whirl. 


Sunday, February 23, 2014

Fairisle Gloves

slisen.blogspot.com
(Click on photos to enlarge)
This is not my pattern but I just had to brag about them.  I never thought I’d be knitting gloves as I always thought that the time and energy involved weren’t worth the effort.  How wrong I was.  I saw these posted on Ravelry.com and thought they were so very pretty that I just had to try them.  It took me a couple tries to get my head wrapped around the pattern but after I accomplished that, my first prototype was a success and knew that I needed a pair.  I really like them.  Ya can’t buy gloves as nice as these. 

I used some pretty bad superwash merino/nylon sock yarn that I wasn’t going to use for socks for the main yarn and the contrast yarn came from the closeout bin at Hobby Lobby.  Both are a bit heavier than the sock yarns I’d normally use so I increased the tension dial a full number higher than the pattern called for and I worked the fairisle section a full number higher than what I knit the fingers.

The pattern was developed and posted on Ravelry.com and on her blog by Ingrid Cojocaru, AKA ‘bruchaip’.  Best of all Ingrid was kind enough to offer it to us for free. 

Thursday, October 17, 2013

Felted Fingered Mitten

slisen.blogspot.com
(Click on photos to enlarge)

I really like the looks and warmth of mittens but I don’t wear them at all because they’re so clumsy.  I like to be able to use my fingers without having to take a mitten off.  So I got to thinking and looking around and thought that I could easily use my felted mitten pattern to add a finger just as I did the thumb.  One finger is better than none at all when it’s really cold.

My felted mitten pattern features a shortrowed fingertip but only one side of the fingertip is shaped on this mitten so I used decreases in the center of the mitten to get the shaping I needed.  It’s not hard at all but does take a bit more time than shortrowing.  These too can easily be made in the round on a machine with ribber.


So, here’s my take on a fingered mitten.  They look kind of strange but they work for me.


FELTED FINGERED MITTEN

Size:  Woman’s Medium
Machine:  KX-350 midgauge
Yarn:  Interlacement’s Sweet Feet sock yarn (2 strands), 4 oz
           (400 yds = 4 oz)
Gauge:  Pre-Felt 5 sts, 6 rows = 1”

CUFF:
1)   CO 42 sts with waste yarn and ravel cord.
2)   With main yarn, e-wrap each needle by pulling the e-wrap thru the stitch already
       on the needle created by the ravel cord.
3)   RC000, T6, K6R.
4)   Work 2x1 rib with latch tool, beginning with the 2nd stitch.

WRIST:
1)   RC000, T7,  K20R (or desired length). 

THUMB GUSSET:
1)   RC000, T8, with 2 prong transfer tool, increase 9 sts on each side by increasing 1
      st on beginning of every row 18 times for a total of 18 added sts.  Fill in the empty
      needle with the heel of the previous stitch from the main body.  Knit across so
      COR. 

2)   Opposite the carriage, scrap off 8 sts with several rows of waste yarn.
3)   K1R, opposite the carriage, scrap off 8 sts with several rows of waste yarn.

HAND:
1)   RC000, T8, K17R on 44 sts.
2)   For finger, opposite the carriage, scrap off 7 sts with several rows of waste yarn.
3)   K1R, opposite the carriage, scrap off 7 sts with several rows of waste yarn.
4)   Continue to knit on 30 sts until RC026, COL.

FINGERTIP SHAPING:
1)   RC000, decrease one st on needle L1 and move all stitches on carriage side in to
      fill the empty needle, K1R.
2)   Decrease one st on needle R1 and move stitches on carriage side in to fill the
      empty needle.  K1R.
3)   Continue decreasing one stitch in the middle on alternating sides, move stitches in
       to fill the empty needle and K1R, until 20 sts remain, RC010.
4)   With 2 prong transfer tool, decrease one stitch on each side, along with the one in
       the middle, K1R.
5)    Repeat step 4.  (14 sts remain)
6)    Scrap off with several rows of waste yarn.

FINGER:
1)  With wrong side facing and finger pieces in the middle of work, hang a total of 16
      stitches with the 7 sts from the left finger section, 1 stitch from that edge of the
      mitten body, 1 stitch from the edge of the right hand mitten body and 7 sts from the
      right finger section.
2)   RC000, K14R.
3)   With 1 prong transfer tool, transfer EOS to its neighbor to the right and move
      stitches together.
4)   K2R.
5)   Dec EOS as above, move stitches together.
6)   K1R and gather.

THUMB:
1)   With wrong side facing and thumbs in the middle of work, hang a total of 18 stitches with the 8

       stitches from the left thumb section, 1 stitch from that edge of the mitten body, 1 stitch from
       the edge of the right hand mitten body and 8 stitches from the right thumb section.
2)   RC000, K2R.
3)   With 2 prong transfer tool, dec 1 st on each edge.
4)   K12R even.
5)   With 1 prong transfer tool, transfer EOS to its neighbor to the right and move stitches together.
6)   K2R.
7)   Dec EOS as above, move stitches together.
8)   K1R, gather and secure.

FINISHING:
1)   Vigorously stretch fabric lengthwise to set stitches.
2)   Loosely graft the fingertip together from purl side.
3)   From the public side, loosely sew all seams with Bickford style stitching.
4)   Felt to desired size.


Saturday, October 5, 2013

Felted Mittens

(Click on photos to enlarge)
slisen.blogspot.com

I’ve been machine knitting for many years but I've never made a pair of felted mittens.  I’ve been wondering what I could make with some worsted wool that I’ve had on hand for awhile, so guess it’s about time for some felted mittens.  They’re based on my favorite mitten pattern with size adjusted to compensate for the felting.  They feature a thumb gusset for better fit and a shortrowed fingertip.
One 4 oz skein will make the size in this pattern.  But they’ll take a bit more yarn if you need a bigger size or want longer wrists and cuffs.  To save on main color yarn, a contrasting color could be used for stripes or a contrasting cuff/wrist.   These are a basic mitten but could be dressed up with colorful yarns, fairisle or embellished with embroidery, needle felting, adding a braid or woven ribbon, line with a pretty fabric, etc.  Another nice option would be to knit a ribbed cuff in non-felting yarn and sew it to the inside of the mitten wrist.  Use your imagination.

The 2nd pair was made with 2 strands of Sweet Feet by Interlacements Yarns, a non-superwash variegated sock yarn, with a gauge of 5 sts and 6 rows per inch.  (3.7 oz)


Felted Mitten

Size:  Woman’s Medium
Machine:  KX-350 midgauge
Yarn:  Aussi Wool Worsted Weight, 4 oz
Gauge:  Pre-Felt 4 sts, 5.5 rows = 1”

CUFF:
1)   CO 42 sts with waste yarn, knit 6 rows with waste yarn and knit 1 row with ravel cord. 
2)   With main yarn, e-wrap each needle by pulling the e-wrap thru the stitch created by the ravel cord already on the needle.
3)   RC000, T6, K6R.
4)   Hand manipulate 2x1 latched rib, beginning with the 2nd stitch.

WRIST:
1)   RC000, T7,  K16R (or desired length).

THUMB GUSSET:
1)   RC000, T8, with 2 prong transfer tool, increase 9 sts on each side by increasing 1 st on beginning of every row 18 times.  Fill in the empty needle with the heel of the previous stitch from the main body.  (The last inc will be on RC017, then K across to RC018, with COR).
2)   Opposite the carriage, scrap off 8 sts with several rows of waste yarn.
3)   K1R, opposite the carriage, scrap off 8 sts with several rows of waste yarn.

HAND:
1)   RC000, T8, K26R on remaining 44 sts.
2)   Put machine on hold and half the stitches opposite the carriage into hold position.
3)   Shortrow on working needles down to 8 sts and back out.  (Use a simple shortrow, do not wrap needle on the increases).
4)   Cut yarn leaving a tail to be used for seaming.
5)   Scrap off both sections with several rows of waste yarn.

THUMB:
1)  With wrong side facing and thumbs in the middle of work, hang a total of 18 stitches with the 8 sts from the left thumb section, 1 stitch from that edge of the mitten body, 1 stitch from the edge of the right hand mitten body and 8 sts from the right thumb section.
2)   RC000, K2R.
3)   With 2 prong transfer tool, dec 1 st on each edge.
4)   K12R even.
5)   With 1 prong transfer tool, transfer EOS to its neighbor to the right and move stitches together.
6)   K2R.
7)   Dec EOS as above, move stitches together.
8)   K1R and gather.

FINISHING:
1)   Loosely graft the fingertip seam from the purl side.
2)   From the public side, loosely sew all seams with Bickford style stitching.
3)   Felt to size desired.  (Mine took 3 cycles of hot/cold).

NOTES:
1)   Use no knots in felted objects.  Knots will result in lumps that you don’t want.  Simply weave the yarn ends in as you normally would.  The felting process ensures that the yarn ends will not loosen and disengage.
2)   During felting, the fabric will shrink up more in length than width.
3)   Before starting the felting, I place plastic bags inside the mitten and pin in place with small safety pins so the layers won’t felt together.  After each wash/rinse cycle, I examine and reposition the safety pins if they’ve gotten dislodged and hidden in the fabric.  My felting for these mittens took 3 cycles of hot/cold wash/rinse and after the 2nd cycle, I removed the safety pins and plastic bags.
4)   All wool is not created equal and the felting process may vary with water temperatures and length of washing cycles.  So check your felting periodically….there’s no turning back if they get too small.

AFTERTHOUGHT NOTES:
1)   After making several of these mittens, I found that with some yarns the thumb base was a bit tight and needed some stretching while drying.  So I've reworked the instructions for the thumb gusset by adding 2 stitches.  Then when knitting the thumb, I knit 2 rows and then decreased 2 stitches, then knit the rest of the thumb as in my original pattern.  It works out well.
2)   I found it totally unnecessary to place a plastic bag inside the mitten while felting.  The sides do not felt together as I would have suspected.  But you can add the plastic if you're worried that they will.
 

Sunday, March 3, 2013

Mitten, 2 Color, Double Bed Jacquard, Birdseye Backing


(Click on Photos to Enlarge)
slisen.blogspot.com
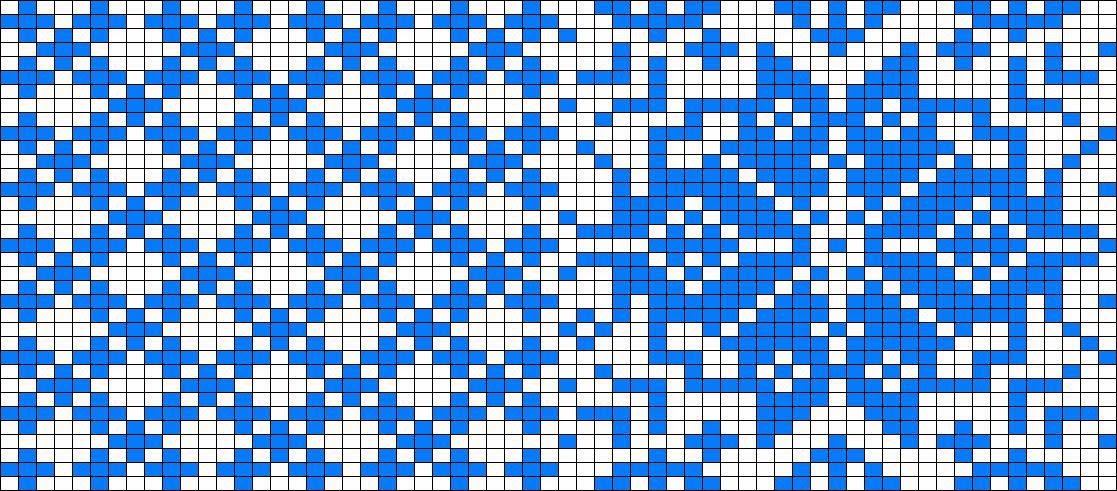
I just finished a pair of mittens in double bed jacquard that I really like and want to share with you.  I like the looks of fairisle but don’t do much of it because of dealing with the yarn floats carried on the back.  So unless I use a pattern with no more than 3 or 4  stitch floats, I usually don’t do fairisle.  DBJ is the perfect answer for smaller items for me.  It gives a nice double thickness fabric, warm for our cold winters, and no floats to deal with.  DBJ might be a bit heavy for garments though.
I’m going to focus on my pattern for the mittens right now….I plan to do a quick down and dirty tutorial on dbj in another post soon. 
I designed the stitch pattern in DK7, using Stitchworld pattern #20 for the hand and a 1x1 column of alternating colors in the cuff.  The cuff is not ribbed but done in dbj at two tensions tighter than the hand.  The mitten is made with 2 identical pieces, a front and back, and seamed together.  The thumb is knit separately and mattress stitched in the side seam above the cuff.  If I had more patience and could assure myself that I could resume the pattern, I would do the thumb gusset in one piece.  But mattress stitching it in worked well for me.
Seaming in dbj is quite easy actually.  Work a mattress stitch on the edges of the public side and it leaves very little bulk on the inside and is quite invisible on the public side.  It took me a bit to ‘see’ the stitches to pick up while mattressing, so look for the ladder st between the layers of fabric.
I worked the thumb in fairisle because I didn’t want to deal with all the increases in dbj but I will work on that when I have the fortitude and patience.  After I knit each row, I hung the longer yarn floats on a needle above to prevent thumb snags on the floats.
One last comment I want to make about dbj is to make a swatch, launder and dry as you would the finished item, then take your gauge measurements.  My length of my finished mitten shortened a bit;  my theory is that the heavy ribber weights stretched the stitches as I knit.  Washing and drying brought them back into shape nicely.  But of course this will depend on the yarn being used.  So do yourself a favor and swatch, launder and dry before measuring for gauge.
So….here goes.  If you see any glaring mistakes or have questions, please feel free to leave a comment and I’ll get right on it.

MITTENS, 2 color DBJ, Birdseye Backing  
                                               
Size:  Woman’s Medium, 7.5” L without cuff
Machine:  Brother KH965i and KR850 ribber
Yarn:  Main Color WEBs Sock yarn on cone
          Contrast Color 5th Avenue Funky sock yarn
Tension: T7 in hand, T5 in dbj cuff
Gauge:  Approx 8 sts, 20 rows = 1”

CORRUGATED CUFF:
1)  CO 28 sts as for dbj, pitch H5, ribber slide lever on 'lili' or ‘II’ for a tighter cuff.  (Must be even sts on ea bed)
2)  T1, K across from L to R for zig zag row, hang CO comb and 2 large ribber weights; T2, set carriages for circular and K2R; T5, K1R across all needles, past the L turn mark and  into the color changer.  COL.
3)   Set machine for dbj and K21 pattern rows after the foundation cast on rows.  (43 rows on RC)

HAND:
1)   T7, ribber slide lever on ‘lili’, K in dbj pattern to RC156.  (79 rows in dbj pattern)  COR. 
2)   Make all decreases when COR.  Keeping in pattern, decrease fingertips by 2 sts with 3 prong tool on each side of each bed.  To decrease 2 sts on each bed, use 3 prong tool and move the outermost 3 sts in 2 needles.  There will be 2 sts on ndls 2 and 3 on both beds.
3)  K4R,  remembering to keep in pattern and changing yarn when carriage is on the left hand side.  Be sure to keep an even number of stitches on both beds and empty needles moved to out of work before knitting across. 
4)   Dec fingertip down to 8 sts ending with RC175 and COL.
5)   Discontinue DBJ patterning and set carriages back to plain knitting.  Transfer ribber sts to corresponding main bed needles.  There will be 2 sts on ea needle. 
6)   T6, K1R across.
7)   Scrap off with several rows of waste yarn for grafting later.

Make 2 identical pieces, however you may use a different pattern for the other side if you choose.  

THUMB:   Make 2  (Worked in fairisle using the same fairisle pattern as the hand)
1)   Begin with WY and ravel cord, hang weights and e-wrap 3 sts.
2)   RC000, T7, K3R with a single strand of yarn.   
3)   Set machine and yarns for fairisle patterning.
4)   Increase 1 st on carriage side of every row until 26 sts by bringing out one ndl to upper working position before knitting across.
5)   Knit even in fairisle patterning to RC048.  Then discontinue fairisle and set machine back to plain knitting.
6)   Cut one yarn and continue with only one strand.  Dec sts to EON across.  Move all empty needles out of work.
7)   T3, K1R, gather and secure.

FINISHING:
Graft fingertips, mattress st side seams leaving a space in one side seam for the thumb. To fit the thumb in, I seamed the cuff first then positioned the thumb and sewed it in with mattress st, up one side and down the other. The thumb sts may need to be eased in to fit the opening.


This is an example of birdseye backing, set with the 'lili' buttons.  It's kind of hard to pick the pattern out with the varigated yarn, but birdseye knits every other stitch alternating on each row, like a checkerboard pattern.  For ribbers without 'lili' buttons, the backing will be striped, one color per row.    

Tuesday, January 1, 2013

Fingerless Mitts, Midgauge

slisen.blogspot.com

I love mittens but don't like not being able to use my fingers while wearing mittens.  So fingerless mitts are the perfect answer for me.  They can be knit plain to be practical or in nice patterns for a good looking mitt.  Here's my pattern.


(Click on photos for larger image)
Machine: Brother KX350 or Silver Reed SK860 Midgauge
Yarn: Berroco Vintage or Classic Shades by Universal
Main Tension: 4
Ribbed Tension: 2
Gauge: 5.5 sts, 8 rows =1”
Size: Woman’s Med

Wrist Ribbing:
1.  E-wrap CO 42 sts with scrap and ravel cord.  (40 if Bickford type seaming)
2.  T2, K 18 rows, or length desired.
3.  Latch 1x2 rib.

Wrist:
1.  T 4, K  8 rows, or length desired.  COR.

Thumb Gusset:
1.  RC000.  T 4.
2.  Increase one st at the beginning of each of the next 16 rows.  (I use the 2 prong tool to move the sts out, then fill the empty needle with the ‘heel’  taken from the next st toward the center of the bed)
3.  Starting on the side away from the carriage, manually remove  8 sts from the edge of the needle bed on several rows of waste yarn, leaving the remaining hand stitches on the machine. 
4.  K1R across and remove the same number of sts on the other side away from the carriage.

Upper Mitten:
1.  RC000. 
2.  T4,  K 8 to 10 rows.  (Or length desired)
3.  T2 + one click, K 7 rows, or length desired.  (COR)
4.  Latch 1x2 rib on the 7 rows.
5.  Back stitch BO.  (I prefer from right hand side)
  
Thumb:
1.  RC000. 
2.  With purl side facing you and center thumbs neighboring each other, pick up and hang on the needle bed 16 thumb sts from each piece of waste yarn PLUS 2 full sts, one from each side of the body at the seam side. 
3.   T4,  K 2  rows.  (Or length desired)
4.   T2 + one click, K 6 rows (COR).  May need to knit 1 more row to move carriage to the right hand side.
5.   Latch rib in 1x2.
6.   Back stitch BO.

Finishing:
1.   Sew seams with mattress stitch or a Bickford type seam.  If using a flat Bickford type seam reduce CO by 2 sts.
2.   Weave in yarn ends.

Notes:
1.   Use your ribber to work the ribbing instead of latching the ribbed rows.
2.   Length of the hand, thumb or ribbing may be adjusted by adding or subtracting rows.
3.   Cables, fairisle, tuck or other patterning may be used in the hand portion, but keep in mind that most patterning may alter the gauge.
4.   You may omit the ribbing on the thumb and/or hand if desired, but the edges will curl unless treated otherwise, such as a crocheted edging.
5.   Make 2nd mitt to match, unless using a pattern design on the back.  Then begin CO on opposite side of machine and reverse all shaping.
6.   Mitts may be knit in the round on machines with ribbers.  My trick to that is making the upper hand and thumb ribbings separately and grafting from the purl side afterward.
7.   The mitts may be worn over little knit gloves found at our favorite discount chain store.  But CO sts or tension may need to be increased to fit comfortably over the gloves.  They will be nice and toasty.