Showing posts with label standard gauge. Show all posts

Sunday, January 27, 2019

More Baby Socks

slisen.blogspot.com
(Click on photos to enlarge)

I’ve been in the ‘knitting for baby’ mode for a new grandbaby in the family and can’t believe I haven’t posted these little socks on my blog yet.  Guess I’ve been preoccupied.  These are made on my standard gauge machine with a couple different brands of non-wool self striping sock yarns.  I’ve knit them flat and seamed the side later but could easily be knit in the round if desired.   My pattern is designed with a 3-1/2” sole to fit 0 to 3 months but can easily be resized by adjusting stitches and rows.  
They are just adorable and mom and baby just love them.  The two yarns are Premier Wool Free Sock Stripes which is acrylic and polyester, and Loops & Threads Perfect Pair yarn which is acrylic, polyester and bamboo.  Both are easy knits and soft for baby.   So here we go.
Size: 0-3 mos (3.5” sole)
Machine:  Standard gauge
Tension 6
Gauge:  9 sts, 12 rows = 1”
CUFF:
1.  CO 40 sts in 1x1 ribbing.
2.  Knit 14 rows (or 30 rows for a foldover cuff).
3.  Transfer ribber stitches to main bed.  (or do a mock or latched rib if you don't have a ribber.
ANKLE:
Knit 17 rows total in the ankle. 

BUT if you want an eyelet row,
            a.  Knit 6 rows and make eyelets by transferring one stitch to its neighbor beginning
                with the 2nd needle from the left.  The eyelet row looks like this after transfers are made:
                  . x .. x .. x ….. x .. x .. x .. x ..  etc,  to end of row.
            b.  Keeping empty needles in work, knit 11 more rows to make a total of 17 rows.
HEEL:
1.   Put half the stitches away from the carriage into hold position.
2.   Make sure there are even stitches in work, put machine on hold and shortrow down to 8
       stitches and back out.
FOOT AND TOE:
1.  Knit 28 rows.
2.  Decrease EON, move stitches together and knit 2 rows at T7.
3.  Gather live stitches and secure.
FINISHING:
Mattress stitch the side seam using the 1/2 stitch on each side.  Use a Bickford seam in the ribbing.  Knit a 2 stitch I-cord at T2 for about 18”.  Weave the cord thru the eyelet row and double knot each end.  Or pompoms or tassels can be added if desired.

Wednesday, January 9, 2019

Baby Socks

slisen.blogspot.com
(click to enlarge)

What’s a gramma to do for a new baby when mom is a Green Bay Packer’s fan and dad is a devoted Minnesota Vikings fan?  She knits a pair of each to wear on football game days during those friendly rivalries.  These socks are knit in the round on my standard gauge machine with ribber with shortrowed heels and toes, but they can be knit flat and seamed up the side if desired.
Size: 0-3 months  (3-1/2” sole)
Machine: Standard Gauge
Yarn:  Tamm 3 ply Astracryl
Gauge at T6:  8 sts, 12 rows per inch

1.     T7, CO 32 sts, 1x1 rib for 14 rows for cuff, 24 rows if you want a foldover cuff.

2.     T6, transfer all main bed stitches to ribber bed, knit 1 row and convert to circular with seam up the back on center of main bed, K to RC014.

3.     Then make an eyelet row for tie as desired, leaving empty needles in work. Eyelets on L6, L2, R2, R6 on main bed; L7, L3, R3, R7 on ribber bed.

4.     Knit to RC013 for ankle. (27 rows total in ankle)

5.     T5, shortrow heel down to 6 stitches and back out.

6.     T6, knit 36 rows for foot.

7.     T5, shortrow toe as for heel. Scrap off both beds.

8.     Graft toe seam, sew ribbed cuff with a Bickford stitch, secure all yarn tails and weave in.

Knit a 2 st I-cord at T3 for about 18” (approx. 260 rows) long and run thru eyelet row. Double knot ends of ties or attach pom-poms or tassels if desired.

This sock can easily be made larger by increasing CO sts and/or rows.

Friday, March 20, 2015

Tapered Leg Warmer


slisen.blogspot.com

 I got desperate this winter and worked up a couple pairs of tapered leg warmers with superwash wool sock yarn on my standard gauge machine with ribber.  The other straight ones I made (in a previous post) were fine but they did slouch a bit and I wanted them to stay up and cover as much skin as possible.  Don’t know about you but my legs aren’t straight up and down so I devised a tapered version to better fit my leg contours merely by adjusting tension from tighter tension at the ankle to looser at the knee.  And as luck would have it, I had just received the Lycra that I ordered and added it to the top few rows.  Works great and kept my legs toasty through the awful cold of winter just fine.  Here’s what I did.  You can adjust number of cast on stitches or tensions that will best fit your leg.  One 100 gram skein of sock yarn will make a pair of warmers.
P.S.  Do you know how hard it is to take a picture of your own legs???


Saturday, January 10, 2015

Leg or Arm Warmers

(Click on photos to enlarge)
slisen.blogspot.com

We’ve been experiencing several Arctic blasts this winter and I’m cold!!  I normally don’t mind hibernating thru this time of year but we haven’t been so lucky this year to be able to stay in when we want to.  Sometimes there just aren’t enough clothes to keep a body warm but I happened to think of some leg warmers that I made a few years ago for others and seemed to remember that I had one pair left in my cupboard that just needed seaming up.  So I quickly seamed them and am a believer!  Oh my, no cold bodied person should be without them during the winter time in the upper Midwest.  I ran thru my stash and found enough yarn to make another pair so now I have 2 pairs.  I most undoubtedly will make another pair but these 2 pairs will atleast give me a pair to wear while one is in the laundry.  

I used my g-carriage for the pairs I made previously, probably because I was busy with other things and the g-carriage can run while I’m doing other fun stuff.  But this year, I used my KH965i and ribber and I think I like them better.  Ribbing with the g-carriage doesn’t seem to retain its memory like a machine and ribber but that may be just a matter of adjusting to a tighter gauge with the g-carriage.


(One each warmer from 2 pairs, slouched)
I used superwash wool sock yarns, except for a couple pairs that I made with acrylic sock yarn for my sister who is allergic to wool.  They are so simple and easy to make, just a rectangle knit to desired length and seamed up.  They can be adjusted for size by adding or subtracting stitches and rows.  They can be worn slouched or pulled up to knee for maximum coverage.  One 100 gram skein of sock yarn will make a pair but I found that by adding more length, the top can be rolled down to make a cuff and they are extra toasty and seem to stay in place better. 

Gauge will vary with yarns as not all sock yarns are created equal.  As with socks, sock yarn will stretch with wear so be mindful of this when you chose your tension.  The warmers are best if they fit snugly but not tight.  If you want your warmers to slouch, use a loose gauge.  A tight fabric will not be as warm as a looser knit fabric, so do some experimenting with the yarn you’re using.

So here’s my take on easy, peasy leg warmers.

Machine:  Standard gauge machine with g-carriage or ribber
Yarn:  Any superwash wool/nylon mix or sock yarn of choice
Tension:  6 to 7, depending on yarn and size
Size:  Will fit woman’s medium and will be about 16” unstretched
               (Add or subtract stitches and rows depending on size desired)

Start with dividing a 100 gram skein in half.  A postal scale is invaluable for weighing ounces.


(Made with acrylic sock yarns)
1.  CO 90 sts, with closed CO of choice.  (With the g-carriage I like to use a double needle e-wrap.  With the ribber, I like to e-wrap CO the main bed, knit 1 row across, then transfer stitches to the ribber bed in desired ribbing pattern, hang CO comb and knit away.  I prefer 1x1, 1x2 or 2x2 ribbing.)

2.  Knit in ribbing for atleast 170 rows, more if you want foldover cuffs and if you have enough yarn.

3.  Loosely bind off.  I like to end with the carriage on the left and do a back stitch bind off, which will give a nice flexible BO.

4.  Seam with mattress stitch or I prefer to use a Bickford seam, which gives a nice flat seam and makes the legwarmers pretty much reversible.

Think outside the box and make arm warmers using the same theory as for the leg warmers; knit a ribbed rectangle in width and length as needed for size.  Leave an opening in the seam a couple inches below the edge for the thumb to fit through.

Monday, September 22, 2014

DBJ Sampler Wall Hanging

slisen.blogspot.com
(Click on photo to enlarge)


A while back, I ran onto a fairisle knit sampler project in an old magazine and thought it would be a wonderful double bed jacquard (dbj) wall hanging for a special occasion such as a wedding, a new baby, a milestone birthday or anniversary, etc.  So I put it in the back of my mind until now when we have a friend's wedding to celebrate.   I wanted to frame it to make it a bit more professional looking than just running a dowel thru the top to make a banner type design but I really didn't want to invest in the cost of having a custom frame made....so I was off to knit it to fit a ready made frame.  It went pretty well but I ran into a bit of frustration with several swatches to accomplish that.  Once I got a good gauge and used a bit of math, the end product turned out really nice.  I'm really happy with it and hopefully it will become an honored keepsake for the bride and groom. 

One thing I did learn with dbj is that even with aggressive steam blocking, stretching in length proves to be stubborn.  The knitted size is basically how it will stay even after steaming.

I did this project at T6 with Tamm 3 Ply Astracryl for the background and Schoppel Zauberball in blues for the contrast color on my standard gauge Brother 965i with ribber and color changer.  I designed the pattern in DAK with 108 sts wide and 160 rows high, knit with a birdseye backing which after steam blocking fit a 14 x 18" frame opening nicely. 

To see my lesson on how to do dbj, go to my post of March 12, 2013.  DBJ is not hard at all but the setup steps must be followed to a 'T' for it to cooperate. 

Saturday, May 10, 2014

Fairisle Gloves, Revisited

slisen.blogspot.com
(Click on photos to enlarge)

I loved the gloves I made with this pattern earlier (from Feb 2014) and got a wild hair in my brain to try to use up some Tamm Sport 2/7 that I have in my stash to give a bit heavier fabric.  I was pleasantly surprised that I could use the same pattern without too many alterations.  I did need to decrease the number of rows by 4 in the pinkie finger and I did use different tensions than Ingrid's pattern.  I used T5 in the ribbing, T8 in the fairisle section and T7 for the thumb and fingers.  I have some other lovely fairisle patterns that would be nice but think I'm about gloved out right now and need to move on.  But I won't hesitate to make more as my time permits.  We're finally moving into nicer spring weather now and will have other fun things to do.

Here's Ingrid's pattern if you want to give a nice pair of gloves a whirl. 


Sunday, February 23, 2014

Fairisle Gloves

slisen.blogspot.com
(Click on photos to enlarge)
This is not my pattern but I just had to brag about them.  I never thought I’d be knitting gloves as I always thought that the time and energy involved weren’t worth the effort.  How wrong I was.  I saw these posted on Ravelry.com and thought they were so very pretty that I just had to try them.  It took me a couple tries to get my head wrapped around the pattern but after I accomplished that, my first prototype was a success and knew that I needed a pair.  I really like them.  Ya can’t buy gloves as nice as these. 

I used some pretty bad superwash merino/nylon sock yarn that I wasn’t going to use for socks for the main yarn and the contrast yarn came from the closeout bin at Hobby Lobby.  Both are a bit heavier than the sock yarns I’d normally use so I increased the tension dial a full number higher than the pattern called for and I worked the fairisle section a full number higher than what I knit the fingers.

The pattern was developed and posted on Ravelry.com and on her blog by Ingrid Cojocaru, AKA ‘bruchaip’.  Best of all Ingrid was kind enough to offer it to us for free. 

Sunday, February 9, 2014

Socks for Wide Ankles or Calves

slisen.blogspot.com
(Click on photos to enlarge)


Getting socks to fit those with extra wide ankles or calves can be frustrating.  I’ve tried tension graduation from the ribbing down to the foot with a bit of success but I still don’t find that I can get enough extra width in the calf area and I don’t like to loosen tension in the ribbing too much.  So I got my mind wrapped around adding more stitches at the ribbing than I normally would and evenly spacing decrease stitches as I work down toward the heel.  It’s not a quick knit because it involves moving stitches together after the decreases and transferring stitches from bed to bed but it works for me and I can get a nice fitting sock for those who need more fabric in the calf or ankle area.

I work my socks in the round on my standard gauge machine and ribber from the cuff down with the ribbing seam up the back of the leg.  The same can be achieved with a toe up sock, just reverse the shaping from decreases to increases.  As with any sock, good measurements are key to a good fitting sock.  I want enough stretch so the fabric is not stressed but not so loose that the sock bags and won’t stay up in place.

Knitting a flat sock would be much easier to incorporate the increases and decreases but I don’t like seams in socks so this is the theory behind my madness and here’s the method of my madness.  As an example, I’m using these calculations for socks I made with Cascade Heritage sock yarn at T5.  Cast on as many stitches and add evenly spaced decreases as needed to fit the foot you’re knitting for.

9.5” long foot, 9” around foot, 9” around ankle, wide calf
T5 Gauge:  9 sts, 11 rows = 1”

Ribbed Cuff:
1.  CO 80 sts, 1x1 rib at T3+ for 50R,
2.  Transfer MB sts to RB and K1R across at T5.
3.  Convert to circular knitting by transferring outermost 1/4 of total sts from ribber bed to main bed.

Leg:
T5, 114R total in leg.
1.  At RC002, 028, 054 and 080, decrease one st on 3rd st each side of 0 (from outside toward center),    Dec down to 72 sts  (With ribbing seam up the back, work decreases on main bed) 
2.  Move sts in to fill the empty needles and move the outermost left hand st from the ribber bed to the left hand outermost empty needle on the main bed, then move all ribber bed sts one needle to L  (See note 1 below.)
3.  After all decreases are made, move all sts on the ribber bed to center over 0 so the heel is centered on the back seam, ensuring that there are the same number of sts (36) on each bed.  (See note 2 below)
4.  Knit even to RC114.

Heel, Foot and Toe:
1.  Shortrow heel down to 12 sts and back out, with Woolly Nylon.
2.  K116R in circular for foot.
3.  Repeat toe as for heel.

NOTE 1, To work decreases:
  1.  With COR, move sts together to fill holes at decreases on the main bed,
  2. Transfer outermost left hand ribber bed st to outermost left hand main bed empty needle,
  3. Move all ribber bed sts one needle to the left.  There should be the same number of sts on each bed.
NOTE 2, To center ribber bed sts on ‘0’ again:
     a.   With COR, move all ribber bed sts one needle to the right,
     b.  Transfer outermost left hand main bed st to outermost left hand empty ribber bed needle,
     c.  Unravel far right ribber bed stitch and transfer to outermost right hand empty needle on the  main bed.
     d.  Repeat the steps in a. thru c. til same # of sts on ea side of ‘0’ and same # of sts on ea bed.
     e.  Resume circular knitting.


EDITED after I received a nice comment below from Tanya, AKA 'ItMakesYouSmile' from Ravelry.com:
Tanya commented with another good suggestion of how to decrease/increase in the calf area to fit wide ankles or calves for a longer sock or stocking.  She suggested that it might be easier to move half of the stitches to the ribber bed and make the decreases on both sides of the open seam line, then rotate back to start the heel and complete the foot.

I’m happy to report that I had time to play with this and found that for a short sock with only 4 or 5 decreases/increases that the difference was about the same.  But I can see the definite time saving advantage for using her method in a longer sock or stocking.  After I got the decreases done, I scrapped the whole thing off (both beds) and rehung to center the heel section.  Another way would be to scrap off or use a Decker comb just the ribber stitches and transfer them back to the main bed, then either scrap off or use a Decker comb to convert to circular.

Thank you Tanya, for giving us another way to do this.

Thursday, December 26, 2013

Ribbed Knee Socks

(Click on photo to enlarge)
slisen.blogspot.com

On the Christmas list for one of our granddaughters was a pair of neutral colored knee socks.  I usually have sock yarn on hand so I went stash hunting and came up with the perfect natural colored yarn.  So on to the pattern.  I’d never made a pair of knee socks before this and I spent a few days thinking out my plan of attack for the ribbing up to the knee to compensate for the larger-than-ankle calf.  And not having her here to measure, I was kind of taking a shot in the dark on size.  My shot worked out well and they fit!  I love it when one of my brain children work out well.  I must admit though that my decreasing in the ribbing needs to be improved to give better looking decreases, hence a better looking seam line.  I’ll take time later to work that out but she really liked the resulting socks, even with the bad decreases.
Machine:  Brother KH965i with ribber
Yarn:  Cascade Heritage Sock Yarn, 2 skeins
Gauge:  T5 in body for 9 sts, 11 rows per inch
Size:  9.5” foot
CUFF:
1)  CO 76 sts, with e-wrap CO, K1R to L and transfer sts to ribber in 2x2 ribbing.
2)   Hang CO comb and weights.
3)   T7, K114R in 2x2 rib.
4)   T6, dec one st each side, K12R.
5)   T5, dec one st each side, K12R.
6)   T4++, dec one st each side, K12R.
7)   T4, dec one st each side, K12R.
8)   Knit in rib at T4 to RC186 and decreasing the same as above, until 64 sts remain.
9)   For the ribbing seam up the back, transfer all mb sts to the ribber, K1R at T5.
ANKLE:
1)  T5, move the outer 16 sts on each side to the main bed and K21R in circular.
HEEL:
1)  T5 and with one strand of Woolly Nylon shortrow down to 10 sts and back out.
FOOT:
1)   T5, return to circular knitting and K116R.
TOE:
1)   Repeat as for heel.
FINISHING:
1)  From wrong side, sew ribbing seam with one of the Bickford style seam.
2)   Kitchener stitch the toe seam from the purl side.


Thursday, May 23, 2013

Mock Ribbed Socks

slisen.blogspot.com
(Click on photo to enlarge)


I need a couple more pairs of lighter weight socks for summertime wear and I had some nice CoBaSi cotton yarn in my stash.  I really like this yarn.  It’s 55% cotton, 16% bamboo, 8% silk and 31% elastic nylon.  Most of the other cottons I’ve tried are about as heavy or heavier than most of my wool socks so they really aren’t much of a benefit in warmer weather.
  
The label on CoBaSi recommends 6.5 to 8 sts per inch, but I knit the ribbing in T5 and the body at T6 on my standard gauge machine, which gave me a gauge of 9 sts and 12 rows per inch.  I don’t like sloppy socks and these seem to hold their shape well and stay on my feet at this gauge.

I wanted something a bit different than the plain ol’ socks that I normally knit but I really don’t have much patience for hand manipulated lace so this is what I decided on.  After I knit the ribbed cuffs, I converted to circular knitting, then transferred every 6th stitch to out of work position and knit as I would any other circular sock.  After I worked the shortrowed heel, I continued with the foot in circular but didn’t work the out of work needles on the sole. 

My foot is 10.5” long and 8.5” around; here’s my ‘recipe’:
1.  CO 64 sts, 1x1 ribbing for 56 rows at T5.
2.  For a seam up the back, transfer all stitches to the ribber bed.
3.  Transfer ¼ of the stitches on each side to the main bed to work in circular.
4.  Evenly transfer every 6th stitch to its neighbor and put the empty needles out of work.
5.  T6, K110 rows circular in ankle.
6.  Work shortrowed heel down to 10 sts.
7.  Keeping the out of work needle pattern on the ribber bed (instep), K124 rows circular for foot.
8.  Work shortrowed toe the same as for the heel.
9.  Scrap off, sew seam up the back of ribbing, graft the toe seam.

Note that I usually run a strand of Woolly Nylon in the heels and toes of my socks.  If I don’t use Woolly Nylon, I lower my tension dial by one full number.

Tuesday, May 14, 2013

Watermelon Socks, knit flat


slisen.blogspot.com
(Click on photos to enlarge)
 
30 Nov 2016
Well, blogger is at it again.  I've been trying to reply to a nice comment left for this pattern and it won't let me post, so I'm answering the comment from 'Unknown' from earlier this afternoon and hope it helps the rest of you too.
 
The comment was:
I know this is a old post but how many sts did you increase to for the ankle? you start with 66 and it looks like you increase by about 10 (5 each side) but can't be sure.
And my reply is:
Thanks for your comments and bringing to my attention that my schematics might have thrown you (and others) off.  I don't increase any sts for the ankle.  In the case of 66 sts CO, the total number of sts remain at 66, the same throughout.  My schematics appeared that there was an increase so I 'fixed the schematics' diagrams and replaced them to what the actual knitting should look like.  Sorry if I caused some confusion but it should be clearer now.  Again thanks for looking at my blog and bringing this to my attention.


 This is what happens when 2 teenage granddaughters put their heads together and sweet talk their grandmother into making them a pair of socks that they just ‘have to have’.  They, of course, knew they’d win.  ☺

It was a fun project but they didn’t happen overnight.  I couldn’t find sock yarn in colors that I needed so that meant dyeing yarn, which also meant ordering dyes and a cone of sock yarn.  Then I had to wait for the weather to warm up a bit so I could be outside to do the dyeing.  So during the wait for things to come together, I planned my attack and decided on a g-carriage pattern and designed it in DAK.  Then I needed to come up with correct sizing.  The new cone of yarn I got was heavier than the last one I got from the same company and it didn’t gauge out the same.  So I spent a few days working up the pattern and frogging a couple socks until I came up with what I thought would fit one of the girls.  I basted it together and had one of them try it on and, voila, it fit.  So I am a happy camper.


I started with the cuff ribbing, then worked the ankle with the g-carriage.  I wanted the ankle seam to run up the back so I scrapped off ¼ of the stitches on each side of ‘0’ and continued with the garter pattern on the center half of the stitches to the toe.  Then because I wanted the facing garter pattern to be on the public side, I turned my work with a garter bar and I proceeded to shortrow the toe, knit the sole and worked the shortrowed heel in stockinette stitch.  To be able to graft the heel seam and have the pattern continue, I turned the fabric and then scrapped off, to be grafted later.

I randomly worked the ‘seeds’ with duplicate stitch with a strand of black 4 ply yarn split into 2 strands.  I had thought about using glass beads for the seeds but both girls thought they'd prefer the comfort of duplicate stitch.  I seamed each side of the foot, the back of the ankle and lastly grafted across the heel.  I tried a couple different methods of SAYG on the foot sides but they looked too conspicuous for my liking so I opted to use a Bickford seam on the public side after they came off the machine.  Much better.  On one edge of the fabric, I came up thru a loop and down the next knot, then moved over to the other edge and did the same thing…came up thru a loop and down the next knot.   On the back ankle seam, I used the same method but worked from the wrong side of the fabric. 


I soon learned that adding the duplicate stitching for the ‘seeds’ was much easier if done before the sock was seamed up.  I worked the 'seed's vertically so they wouldn't get stretched too much horizontally while wearing.  I seamed one side of the foot, did the duplicate stitches, then finished the seaming. 

What a fun pair of socks!  But there is a lot of hand work after they come off the machine.  I have one more pair to make for the other gal and I'll post pictures when they're done....stay tuned.  I've included my schematic pattern for the first pair I made that might help you get going if you want to make a pair.  This is for a size 8 narrow foot, 9.5" long.

I've also included my DAK 'melon' pattern but you may use any g-carriage design you like.


P.S.  I should add that I use Pro Chemical Pro One Shot dyes.


Saturday, May 4, 2013

My Stars, Baby Blanket, G-carriage

slisen@blogspot.com
(Click on photos to enlarge)

I just finished a g-carriage baby blanket.  I used Cheryl Jiles' dbj pattern from her Crib Quilts IV collection, did some redesigning in DAK, changed her original pattern hearts to stars and knit it on the g-carriage.  The dbj pattern can be ordered by contacting Cheryl Jiles at her 'under construction' website at www.wishknits.com.  It is a great pattern and I've used it for several other g-carriage blankets over the years.

My pattern is 196 sts wide and 412 rows long, knit at T9 for the end borders and T10 in the body.  Finished measurement is 30 x 44”.  I CO with a double needle e-wrap and BO with a latch tool around the gate pegs. I used the Russian join to connect the skeins on this one. I was hesitant to use Russian joins with the g-carriage but they went thru just fine. And I’m really happy not to have to work in all the ends after the fact.


Sunday, March 3, 2013

Mitten, 2 Color, Double Bed Jacquard, Birdseye Backing


(Click on Photos to Enlarge)
slisen.blogspot.com
I just finished a pair of mittens in double bed jacquard that I really like and want to share with you.  I like the looks of fairisle but don’t do much of it because of dealing with the yarn floats carried on the back.  So unless I use a pattern with no more than 3 or 4  stitch floats, I usually don’t do fairisle.  DBJ is the perfect answer for smaller items for me.  It gives a nice double thickness fabric, warm for our cold winters, and no floats to deal with.  DBJ might be a bit heavy for garments though.
I’m going to focus on my pattern for the mittens right now….I plan to do a quick down and dirty tutorial on dbj in another post soon. 
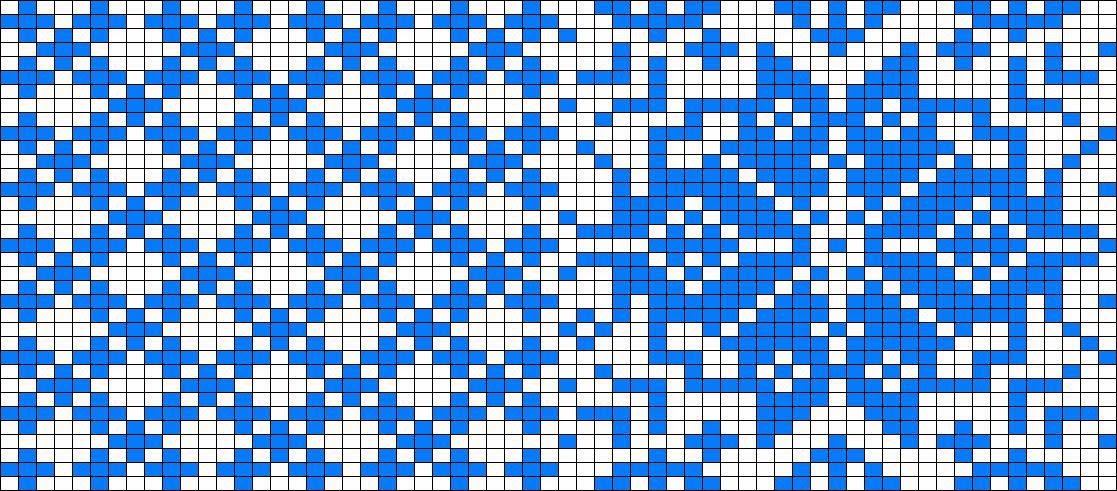
I designed the stitch pattern in DK7, using Stitchworld pattern #20 for the hand and a 1x1 column of alternating colors in the cuff.  The cuff is not ribbed but done in dbj at two tensions tighter than the hand.  The mitten is made with 2 identical pieces, a front and back, and seamed together.  The thumb is knit separately and mattress stitched in the side seam above the cuff.  If I had more patience and could assure myself that I could resume the pattern, I would do the thumb gusset in one piece.  But mattress stitching it in worked well for me.
Seaming in dbj is quite easy actually.  Work a mattress stitch on the edges of the public side and it leaves very little bulk on the inside and is quite invisible on the public side.  It took me a bit to ‘see’ the stitches to pick up while mattressing, so look for the ladder st between the layers of fabric.
I worked the thumb in fairisle because I didn’t want to deal with all the increases in dbj but I will work on that when I have the fortitude and patience.  After I knit each row, I hung the longer yarn floats on a needle above to prevent thumb snags on the floats.
One last comment I want to make about dbj is to make a swatch, launder and dry as you would the finished item, then take your gauge measurements.  My length of my finished mitten shortened a bit;  my theory is that the heavy ribber weights stretched the stitches as I knit.  Washing and drying brought them back into shape nicely.  But of course this will depend on the yarn being used.  So do yourself a favor and swatch, launder and dry before measuring for gauge.
So….here goes.  If you see any glaring mistakes or have questions, please feel free to leave a comment and I’ll get right on it.

MITTENS, 2 color DBJ, Birdseye Backing  
                                               
Size:  Woman’s Medium, 7.5” L without cuff
Machine:  Brother KH965i and KR850 ribber
Yarn:  Main Color WEBs Sock yarn on cone
          Contrast Color 5th Avenue Funky sock yarn
Tension: T7 in hand, T5 in dbj cuff
Gauge:  Approx 8 sts, 20 rows = 1”

CORRUGATED CUFF:
1)  CO 28 sts as for dbj, pitch H5, ribber slide lever on 'lili' or ‘II’ for a tighter cuff.  (Must be even sts on ea bed)
2)  T1, K across from L to R for zig zag row, hang CO comb and 2 large ribber weights; T2, set carriages for circular and K2R; T5, K1R across all needles, past the L turn mark and  into the color changer.  COL.
3)   Set machine for dbj and K21 pattern rows after the foundation cast on rows.  (43 rows on RC)

HAND:
1)   T7, ribber slide lever on ‘lili’, K in dbj pattern to RC156.  (79 rows in dbj pattern)  COR. 
2)   Make all decreases when COR.  Keeping in pattern, decrease fingertips by 2 sts with 3 prong tool on each side of each bed.  To decrease 2 sts on each bed, use 3 prong tool and move the outermost 3 sts in 2 needles.  There will be 2 sts on ndls 2 and 3 on both beds.
3)  K4R,  remembering to keep in pattern and changing yarn when carriage is on the left hand side.  Be sure to keep an even number of stitches on both beds and empty needles moved to out of work before knitting across. 
4)   Dec fingertip down to 8 sts ending with RC175 and COL.
5)   Discontinue DBJ patterning and set carriages back to plain knitting.  Transfer ribber sts to corresponding main bed needles.  There will be 2 sts on ea needle. 
6)   T6, K1R across.
7)   Scrap off with several rows of waste yarn for grafting later.

Make 2 identical pieces, however you may use a different pattern for the other side if you choose.  

THUMB:   Make 2  (Worked in fairisle using the same fairisle pattern as the hand)
1)   Begin with WY and ravel cord, hang weights and e-wrap 3 sts.
2)   RC000, T7, K3R with a single strand of yarn.   
3)   Set machine and yarns for fairisle patterning.
4)   Increase 1 st on carriage side of every row until 26 sts by bringing out one ndl to upper working position before knitting across.
5)   Knit even in fairisle patterning to RC048.  Then discontinue fairisle and set machine back to plain knitting.
6)   Cut one yarn and continue with only one strand.  Dec sts to EON across.  Move all empty needles out of work.
7)   T3, K1R, gather and secure.

FINISHING:
Graft fingertips, mattress st side seams leaving a space in one side seam for the thumb. To fit the thumb in, I seamed the cuff first then positioned the thumb and sewed it in with mattress st, up one side and down the other. The thumb sts may need to be eased in to fit the opening.


This is an example of birdseye backing, set with the 'lili' buttons.  It's kind of hard to pick the pattern out with the varigated yarn, but birdseye knits every other stitch alternating on each row, like a checkerboard pattern.  For ribbers without 'lili' buttons, the backing will be striped, one color per row.